Covered Walkway Chicken Run
Highlighted under: Comfort Favorites
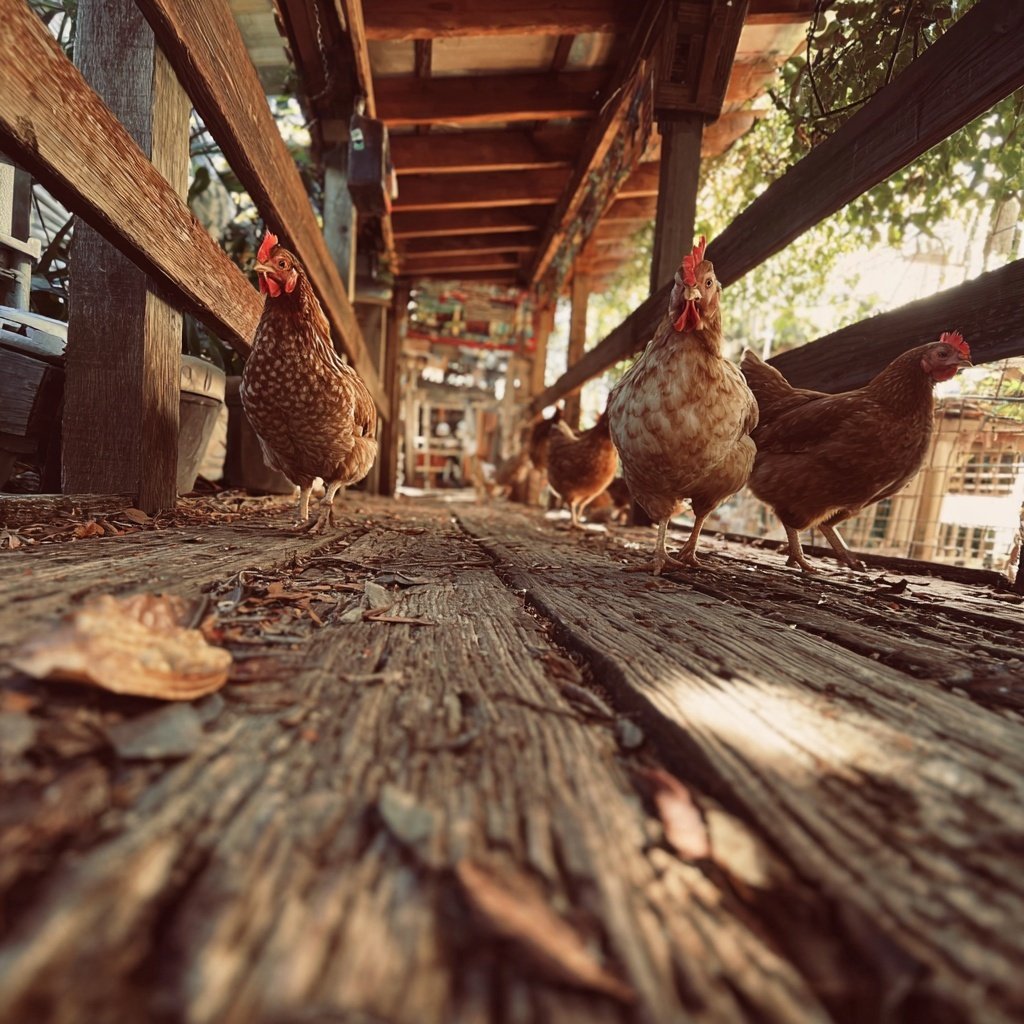
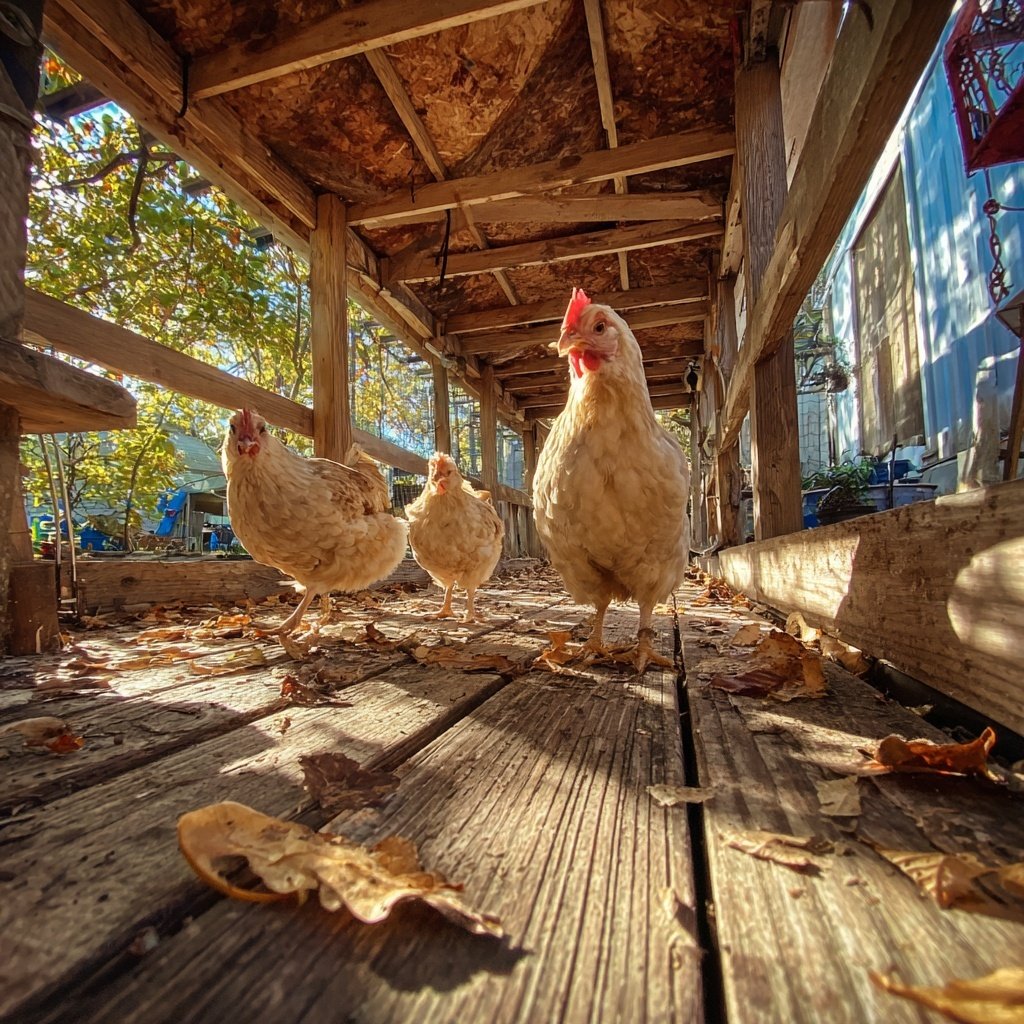
I am thrilled to share my innovative project, the Covered Walkway Chicken Run. This design combines both practicality and aesthetics, ensuring my feathered friends have a safe and dry space to roam. I wanted to create an area that protects them from the elements while also being easy to maintain. Using durable materials and thoughtful layout, this chicken run not only enhances my backyard’s charm but also promotes a healthy lifestyle for my chickens. Join me as I walk you through the steps to create this delightful shelter for your birds.
When I first started building my Covered Walkway Chicken Run, I didn't realize how much joy it would bring to both me and my chickens. The idea stemmed from my need to keep my birds protected from rain while allowing them to enjoy the fresh air. Through trial and error, I discovered the best materials and construction methods that would not only last long but also blend with the natural landscape of my yard.
One specific tip I learned was to incorporate a sloped roof for drainage. This ensures that water runs off rather than pooling on top, preventing potential leaks. Not only does it maintain a dry environment inside, but it also adds an attractive design element. Now, my chickens can roam free, and I can enjoy watching them in their delightful covered space.
Why You Will Love This Chicken Run
- Provides shelter from rain and snow while allowing fresh air
- Enhances your backyard landscape with an aesthetic appeal
- Durable construction ensures it lasts for years
- Easy access for cleaning and maintenance
Essential Materials for Your Chicken Run
Choosing the right materials is crucial for building a sustainable chicken run. The 2x4 lumber used for the frame provides the necessary strength and stability, ensuring the structure can withstand harsh weather conditions. It’s essential to treat the wood with a weather-resistant sealant to prolong its lifespan and protect against rot. Similarly, using high-quality plywood for the roof is key, as it acts as a base for the corrugated metal roofing—this combination ensures maximum durability and protection for your chickens.
The fencing is another critical aspect. Chicken wire is the most popular choice due to its visibility and ability to keep your birds safe from predators. Make sure to bury the wire at the base of the run to deter digging animals. If you're looking for enhanced safety, consider using a stronger option like hardware cloth, which provides better protection against raccoons and other determined predators. Remember, the quality of these materials directly impacts the safety and longevity of your chicken run.
Crafting the Structure
When constructing the frame, precision is key. Use a level to ensure that your structure is even; this prevents water from pooling on the roof and avoids weak spots in the frame. I recommend measuring each section carefully and double-checking your angles before securing with wood screws. This attention to detail not only enhances stability but also makes the building process smoother.
As for the roof installation, aim for a slight slope to facilitate water runoff, which is vital for preventing leaks. Make sure to secure the corrugated metal sheets tightly to the plywood base with roofing nails, leaving no gaps for rain to seep through. Additionally, regularly inspecting the roof for any signs of wear over time can help in maintaining its effectiveness against the elements.
Ingredients
Materials Needed:
Wood Frame
- 2x4 lumber for the frame
- Plywood for the roof
- Wood screws
Roofing
- Corrugated metal sheets
- Roofing nails
Fencing
- Chicken wire
- Wooden posts for support
Tools
- Drill
- Saw
- Tape measure
- Level
Additional Materials:
Instructions
Building Steps:
Design the Layout
Sketch out the dimensions and layout of your chicken run to ensure you have enough space for your chickens to roam.
Construct the Frame
Using the 2x4 lumber, build a sturdy frame. Secure the corners with wood screws for added strength.
Install the Roof
Cover the top of the frame with plywood, then add your corrugated metal sheets for a water-resistant roof.
Add Fencing
Attach chicken wire around the frame and secure it with wooden posts to create a safe enclosure.
Finalize and Inspect
Check all areas for stability and ensure there are no sharp edges. Make necessary adjustments before introducing your chickens.
Final Touches:
Pro Tips
- Consider adding ventilation panels to allow airflow while keeping predators out. Regularly inspect for wear and tear to maintain safety for your chickens.
Maintenance Tips
To keep your chicken run in top condition, regular maintenance is essential. Clean the area at least once a week, removing any droppings and old bedding that can harbor diseases. This not only keeps your chickens healthy but also reduces odors in your backyard. I find that using a small, handheld broom and a dustpan is effective for getting into corners and tight spots.
Check the fencing periodically for any wear or gaps. If you notice any damage or loose chicken wire, repair it immediately to ensure your chickens remain safe. Consider replacing any rusted roofing nails to maintain the integrity of the roof, allowing your structure to continue providing shelter against the weather.
Seasonal Considerations
During winter months, providing additional insulation may be necessary to keep your chickens warm. Consider adding straw or hay to the interior of the chicken run, which acts as both bedding and an insulator. This not only contributes to the comfort of your chickens but can also be beneficial for egg production during colder temperatures.
In summer, ensure proper ventilation within the run to keep your chickens cool. You might install a shaded area or even a small fan if the heat in your area is extreme. Monitoring your chickens for signs of overheating—such as excessive panting or seeking shade—is important to maintain their health and comfort.
Questions About Recipes
→ How long will this chicken run last?
With proper maintenance and durable materials, your chicken run can last for many years.
→ Can I customize the size?
Absolutely! Customize the dimensions based on your backyard space and the number of chickens you have.
→ What type of chickens is this suitable for?
This chicken run is suitable for all standard breeds, providing them with a safe environment.
→ Do I need to secure the ground?
It's a good idea to bury fencing a few inches into the ground to prevent predators from digging under.
Covered Walkway Chicken Run
Created by: Elodie Fairfax
Recipe Type: Comfort Favorites
Skill Level: Intermediate
Final Quantity: 1 run
What You'll Need
Wood Frame
- 2x4 lumber for the frame
- Plywood for the roof
- Wood screws
Roofing
- Corrugated metal sheets
- Roofing nails
Fencing
- Chicken wire
- Wooden posts for support
Tools
- Drill
- Saw
- Tape measure
- Level
How-To Steps
Sketch out the dimensions and layout of your chicken run to ensure you have enough space for your chickens to roam.
Using the 2x4 lumber, build a sturdy frame. Secure the corners with wood screws for added strength.
Cover the top of the frame with plywood, then add your corrugated metal sheets for a water-resistant roof.
Attach chicken wire around the frame and secure it with wooden posts to create a safe enclosure.
Check all areas for stability and ensure there are no sharp edges. Make necessary adjustments before introducing your chickens.
Extra Tips
- Consider adding ventilation panels to allow airflow while keeping predators out. Regularly inspect for wear and tear to maintain safety for your chickens.
Nutritional Breakdown (Per Serving)
- Calories: 0 kcal
- Total Fat: 0g
- Saturated Fat: 0g
- Cholesterol: 0mg
- Sodium: 0mg
- Total Carbohydrates: 0g
- Dietary Fiber: 0g
- Sugars: 0g
- Protein: 0g