Homemade Peanut Butter Cups with Chocolate Shell
Highlighted under: Cozy Favorites
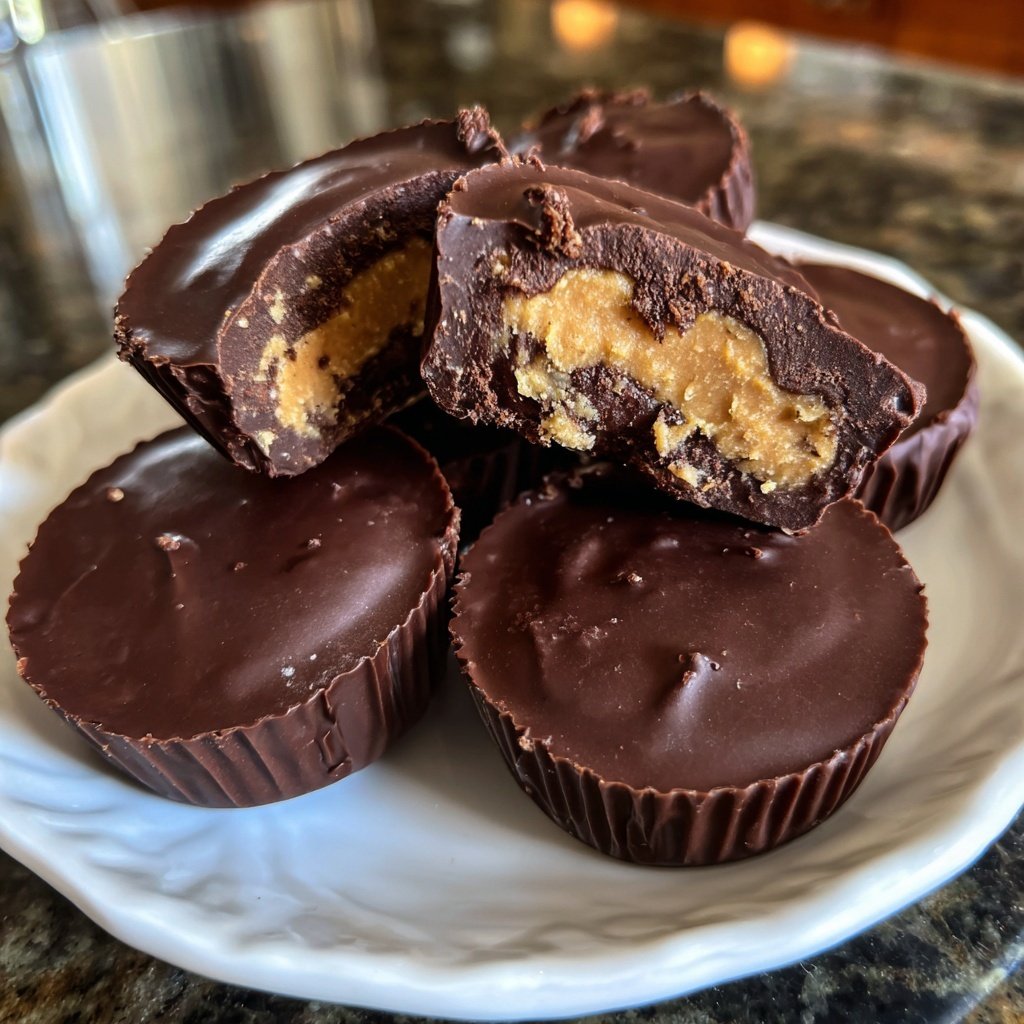
I absolutely love making these Homemade Peanut Butter Cups with a rich chocolate shell! There's something incredibly satisfying about creating this classic treat from scratch. The balance of sweet and salty in the creamy peanut butter filling paired with the smooth chocolate coating is just irresistible. With simple ingredients and straightforward steps, I can whip these up in no time, providing the perfect snack or dessert for family and friends. Plus, they make for an impressive homemade gift that's sure to delight anyone who loves peanut butter!
When I decided to make these Homemade Peanut Butter Cups, I had a craving for something sweet yet comforting. As I prepared the recipe, the aroma of melting chocolate filled my kitchen, and I found myself reminiscing about childhood treats. I learned that using high-quality chocolate makes all the difference in achieving that glossy, velvety shell.
During my first attempt, I discovered that freezing the peanut butter filling slightly before coating it with chocolate helps keep its shape. This tip has transformed my approach, ensuring perfect cups every time. Trust me, once you try making these at home, you'll never want the store-bought ones again!
Why You'll Love This Recipe
- Creamy peanut butter center that’s perfectly balanced with chocolate
- Easily customizable with your favorite nut butter or toppings
- Fun and simple to make, great for involving kids in the kitchen
Understanding the Ingredients
The choice of chocolate is crucial for achieving that delicious outer shell. Dark chocolate chips are preferred for their richer flavor and lower sugar content compared to milk chocolate. However, feel free to adjust the chocolate type based on your taste preferences—semisweet or even white chocolate can provide a delightful twist. Just remember that different chocolates may require slight adjustments in melting time or the amount of coconut oil used to maintain a smooth consistency.
Coconut oil not only aids in melting the chocolate but also helps create a shiny finish once it sets. If you don’t have coconut oil, a neutral oil like vegetable oil can work in a pinch, but it may affect the texture slightly. Always melt chocolate gradually; overheating can lead to a clumpy mess, so use low heat and stir frequently until smooth.
Tips for Perfectly Creamy Filling
When mixing the peanut butter filling, you want a smooth and creamy consistency without any lumps. Using room-temperature peanut butter can prevent clumping; if yours is cold, consider microwaving it for a few seconds to soften. Additionally, the powdered sugar adds sweetness and helps bind the ingredients, so make sure to sift it if it's lumpy to ensure a silky filling.
Don't hesitate to taste your filling as you mix; adjusting the salt or vanilla extract can enhance the flavor profile to suit your preferences. If you're looking for variety, you can also substitute almond butter or cashew butter in the filling. Make sure they are creamy to maintain the right consistency.
Storage and Serving Suggestions
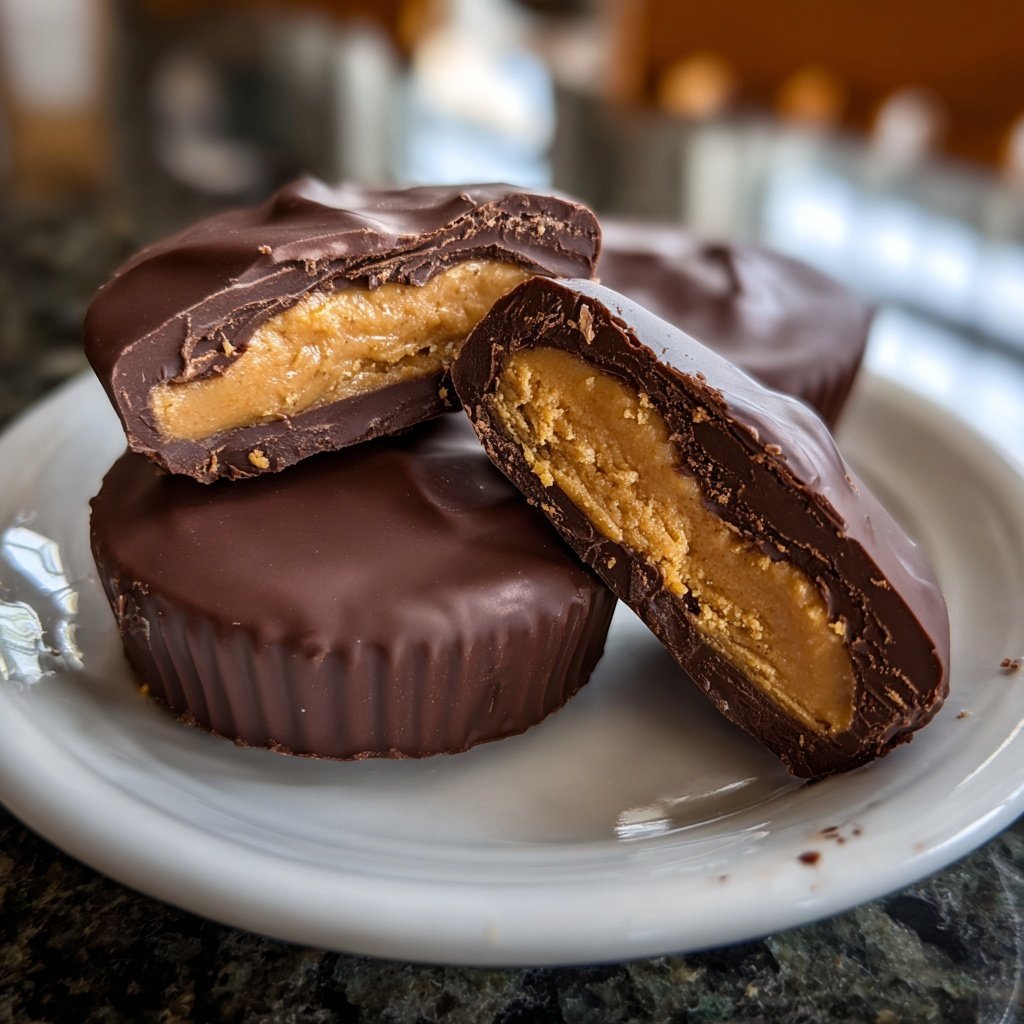
Once your peanut butter cups are set, they can be enjoyed right away, but they are best stored in an airtight container in the refrigerator. This helps maintain their texture and prevents melting. They can last up to two weeks, although I'm sure they won't last that long! For longer storage, you can freeze them. Just layer them between parchment paper to keep them from sticking together, and they'll hold up well for up to three months.
These peanut butter cups are incredibly versatile when it comes to serving. You can serve them as a delightful treat at parties or package them in a decorative box for a thoughtful homemade gift. For an extra touch, try drizzling melted chocolate or caramel over the top before they set, or sprinkling crushed nuts for added crunch and presentation.
Ingredients
For the Chocolate Shell
- 1 cup dark chocolate chips
- 1 tablespoon coconut oil
For the Peanut Butter Filling
- 1 cup creamy peanut butter
- 1/2 cup powdered sugar
- 1/4 teaspoon salt
- 1 teaspoon vanilla extract
Make sure to adjust the amount of sugar according to your taste.
Instructions
Melt the Chocolate
In a microwave-safe bowl, combine the dark chocolate chips and coconut oil. Heat in 30-second intervals, stirring in between until fully melted and smooth.
Prepare the Cups
Line a muffin tin with cupcake liners. Pour a tablespoon of melted chocolate into the bottom of each liner and tilt the tin to coat the sides. Place in the freezer for about 10 minutes to set.
Make the Filling
In a bowl, mix together the peanut butter, powdered sugar, salt, and vanilla extract until smooth and creamy. Remove the tin from the freezer.
Assemble the Cups
Spoon about 2 tablespoons of the peanut butter mixture into each chocolate-lined cup. Pour another tablespoon of melted chocolate over the top to seal. Return the tin to the freezer for another 15-20 minutes until fully set.
Serve and Enjoy
Once set, remove the cups from the liners and enjoy! Store in an airtight container in the refrigerator.
These chocolate cups are best enjoyed chilled!
Pro Tips
- Use high-quality chocolate for a more indulgent taste. You can also experiment by adding toppings like crushed nuts or sea salt for added flavor.
Scaling Up or Down
This recipe is highly scalable, so if you want to make a larger batch for a gathering or event, simply double or triple the ingredients. The process remains the same, but be mindful of your mixing bowls and melting containers’ size—overcrowding can result in uneven melting or mixing.
Conversely, if you're looking to make a smaller batch, you can easily halve the ingredients. Just be sure to adjust the size of your muffin tin or use mini cupcake liners for smaller portions, which can also make for a cute presentation.
Common Troubleshooting
If your chocolate shell isn’t setting properly, it’s likely due to too much liquid from the coconut oil. Ensure you measure accurately, and if you see the chocolate separating and seizing, try adding a teaspoon of cocoa butter or additional chocolate to stabilize it during melting.
Should your peanut butter filling turn out too runny, consider adding a bit more powdered sugar until you achieve a thicker consistency. The key to a great texture in these cups is balance, so a little adjustment here and there can make a big difference in the final result.
Questions About Recipes
→ Can I use milk chocolate instead of dark chocolate?
Yes, feel free to substitute milk chocolate for dark chocolate if you prefer a sweeter taste.
→ How long do these Peanut Butter Cups last?
They can last up to two weeks in the refrigerator if stored properly in an airtight container.
→ Can I make these vegan?
Absolutely! Use dairy-free chocolate chips and make sure your powdered sugar is vegan for a completely plant-based treat.
→ What can I use instead of peanut butter?
You can substitute with almond butter, cashew butter, or any nut or seed butter of your choice.
Homemade Peanut Butter Cups with Chocolate Shell
Created by: Elodie Fairfax
Recipe Type: Cozy Favorites
Skill Level: Beginner
Final Quantity: 12 cups
What You'll Need
For the Chocolate Shell
- 1 cup dark chocolate chips
- 1 tablespoon coconut oil
For the Peanut Butter Filling
- 1 cup creamy peanut butter
- 1/2 cup powdered sugar
- 1/4 teaspoon salt
- 1 teaspoon vanilla extract
How-To Steps
In a microwave-safe bowl, combine the dark chocolate chips and coconut oil. Heat in 30-second intervals, stirring in between until fully melted and smooth.
Line a muffin tin with cupcake liners. Pour a tablespoon of melted chocolate into the bottom of each liner and tilt the tin to coat the sides. Place in the freezer for about 10 minutes to set.
In a bowl, mix together the peanut butter, powdered sugar, salt, and vanilla extract until smooth and creamy. Remove the tin from the freezer.
Spoon about 2 tablespoons of the peanut butter mixture into each chocolate-lined cup. Pour another tablespoon of melted chocolate over the top to seal. Return the tin to the freezer for another 15-20 minutes until fully set.
Once set, remove the cups from the liners and enjoy! Store in an airtight container in the refrigerator.
Extra Tips
- Use high-quality chocolate for a more indulgent taste. You can also experiment by adding toppings like crushed nuts or sea salt for added flavor.
Nutritional Breakdown (Per Serving)
- Calories: 180 kcal
- Total Fat: 14g
- Saturated Fat: 4g
- Cholesterol: 0mg
- Sodium: 95mg
- Total Carbohydrates: 12g
- Dietary Fiber: 1g
- Sugars: 6g
- Protein: 4g